

A wireless meat thermometer is the most impactful upgrade you can make to your grilling. This guide covers setup, probe placement, temperature targets, and how to get the most from your device.
Recommended Thermometers
- MEATER Plus — Best for single-protein cooks, true wireless
- ThermoWorks Signals — Best for multi-protein smoking sessions
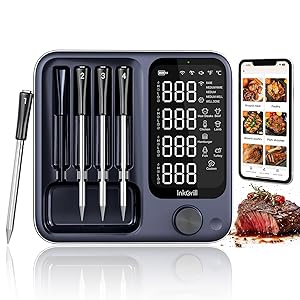
- ThermoPro TP25 — Best budget option with 4 probes
Step 1: Download the App and Pair
Most wireless thermometers use a dedicated app. Download it before your first cook and complete pairing (Bluetooth or WiFi) at home so you’re not fumbling with it at the grill.
Step 2: Probe Placement — The Most Critical Step
Incorrect probe placement is the most common mistake. Follow these rules:
- Insert into the thickest part of the protein
- Avoid bone, fat pockets, and gristle — these read differently than muscle
- Aim for the center — the coldest point of the cut
- For ambient probes: position near but not directly over the heat source
Probe Placement by Cut
- Brisket: Insert into the flat (thickest part), horizontally, 2 inches from the point end
- Whole chicken: Insert into the thigh, between the drumstick and breast, angled toward the body cavity
- Pork shoulder: Insert into the center of the largest muscle, avoiding the bone
- Ribs: Insert between two bones into the thickest part of the meat (middle of the rack)
- Steak/chops: Insert horizontally from the side, targeting the very center
Step 3: Set Your Alerts
Set a high-temperature alert 5–10°F below your target doneness to give you time to prepare. For brisket targeting 203°F, set the alert at 195°F. This gives you time to probe for tenderness before pulling.
Target Internal Temperatures
| Protein | Pull Temp | Rest Time | Final Temp |
|---|---|---|---|
| Beef brisket | 200–205°F | 1–2 hours | 200–205°F |
| Pork shoulder | 195–205°F | 1 hour | 200–205°F |
| Chicken breast | 160°F | 5 minutes | 165°F |
| Steak (med-rare) | 125°F | 5–10 minutes | 130°F |
| Pork chops | 140°F | 5 minutes | 145°F |
| Salmon | 130°F | 3 minutes | 135°F |
Step 4: Understand Carryover Cooking
Meat continues to cook after you remove it from the heat. For thick cuts, carryover can add 5–10°F during resting. This is why MEATER’s guided cook feature pulls your meat early — it accounts for carryover automatically.
Step 5: Probe Care
- Never fully submerge probes in water — wipe clean with a damp cloth
- Check probe tips for damage before each use — bent tips affect accuracy
- Store probes coiled loosely, not kinked, to preserve wire integrity